

Rebuilding the engine of a classic car is not merely a mechanical task; it’s a journey into the heart of automotive history. Owners of classic cars often face challenges with aging engines that demand attention, upgrades, or complete restoration. Understanding the nuances of engine rebuild strategies provides enthusiasts with the tools necessary to maintain the vehicle’s integrity while enhancing performance.
Classic engines typically require specific techniques that differ from modern automotive practices. Each component, from pistons to crankshafts, must be examined and revitalized or replaced to ensure optimal performance. Utilizing correct methodologies for diagnosing issues, selecting parts, and executing the rebuild not only preserves the antique charm of the vehicle but also prolongs its operational life.
Additionally, embracing advanced technologies and resources can significantly simplify the rebuilding process. Implementing modern materials, precision machining, and detailed planning can elevate an ordinary restoration to extraordinary levels. Thus, understanding classic car engine rebuild strategies is essential for any automotive enthusiast who desires to keep their cherished vehicle running smoothly for years to come.
Assessing Engine Condition Before Rebuilding
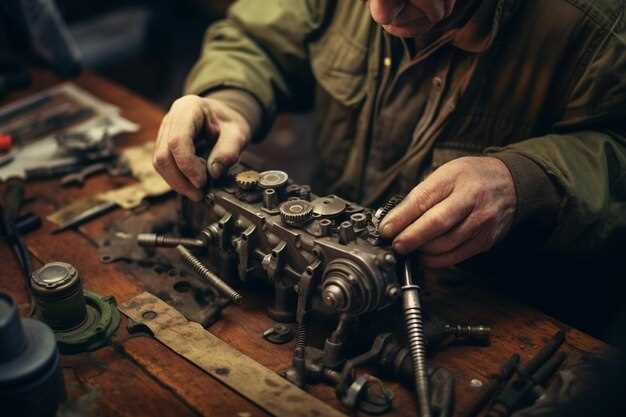
Before embarking on a rebuild of a classic car engine, it is crucial to thoroughly assess its condition. This evaluation will guide decisions on whether a full rebuild is necessary or if smaller repairs can suffice. Begin by checking for visible signs of wear or damage, such as leaks, corrosion, and excessive carbon buildup. A comprehensive visual inspection can reveal critical issues that may affect engine performance.
Next, perform a compression test to measure the pressure within each cylinder. Consistent compression levels indicate a healthy engine, while discrepancies can signify problems with valves, piston rings, or gaskets. Following this, conduct a leak-down test to pinpoint specific areas of air loss within the engine, helping to identify underlying issues that may not be immediately visible.
Additionally, assess the engine oil condition. Check for debris or metal shavings, which can suggest internal wear. The oil’s viscosity and color can also provide insights into the health of engine components. If the oil appears contaminated, it may signal an urgent need for attention.
Examine the timing components, such as the timing belt or chain, for signs of wear. A failing timing component can lead to catastrophic engine failure, making this an essential aspect of the assessment process. Moreover, evaluate the fuel system, including injectors and fuel lines, to ensure proper fuel delivery.Gathering all this information will enable a clear understanding of the engine’s overall health. By performing a meticulous assessment, classic car enthusiasts can make informed decisions regarding rebuild strategies, ensuring that their restoration projects will meet both performance and reliability standards.
Choosing the Right Parts for Classic Engine Restoration
When it comes to restoring a classic engine, selecting the appropriate components is critical to achieve optimal performance and reliability. The choice of parts impacts not only the engine’s functionality but also its longevity and authenticity. Start by identifying the specific make, model, and year of the classic vehicle, as this will guide you in sourcing the correct components.
Prioritize OEM (Original Equipment Manufacturer) parts whenever possible. These parts are designed to match the factory specifications and will ensure your rebuild maintains the original character of the engine. However, for components that are no longer available, high-quality aftermarket alternatives can be an option. Research reputable manufacturers and read reviews to avoid subpar products.
Consider the materials used in the components. For example, a cast iron engine block may require iron pistons, while modern lightweight alloys may serve better in performance applications. Ensure that the materials chosen can handle the intended use of the engine, whether it will be driven on the road or used in competitions.
Pay attention to compatibility. Some parts may fit physically but may not function correctly due to differences in design or specifications. Always double-check compatibility with the engine’s original specifications to avoid costly mistakes.
In addition to the major components like pistons, camshafts, and crankshafts, don’t overlook small items such as gaskets, seals, and fasteners. Quality of these parts is pivotal for creating a reliable seal and preventing leaks. Investing in high-quality gaskets and seals can save a lot of trouble in the long run.
Lastly, consult with experienced mechanics or restorers who specialize in classic cars. Their insights can provide valuable guidance on current trends and recommended parts for your specific engine type. Choosing the right parts for a classic engine rebuild is an essential step towards ensuring it runs smoothly and remains true to its historic roots.
Step-by-Step Process for a Successful Engine Rebuild
The process of rebuilding an engine is complex but rewarding, especially for classic car enthusiasts. A successful rebuild can restore performance and extend the lifespan of the vehicle. Below are the essential steps to guide you through this endeavor.
1. Preparation and Planning
Before you begin, gather all necessary tools and parts. Create a detailed plan outlining the rebuild process, breaking down tasks into manageable sections. Research the specific engine model and understand its unique requirements.
2. Engine Removal
Start by disconnecting the battery and draining fluids such as oil and coolant. Carefully remove the engine from the car by detaching components like the exhaust system, transmission, and any electrical connections. Use an engine hoist for safe lifting.
3. Disassembly
With the engine removed, proceed to disassemble it completely. Take photographs during this process for reference later. Remove the cylinder heads, intake manifold, and oil pan, paying close attention to the order of disassembly to avoid confusion during reassembly.
4. Inspection and Cleaning
Inspect all parts for wear and damage. Measure key components like pistons, cylinders, and bearings using precision tools. Clean all components thoroughly using solvent to remove debris and engine grime, ensuring a clean working environment for the rebuild.
5. Machining and Replacement Parts
Depending on the condition of the components, you may need machining services for the block, cylinder heads, or crankshaft. Order high-quality replacement parts, including gaskets, rings, and bearings, to ensure reliability and performance in your rebuilt engine.
6. Reassembly
Follow the reverse order of disassembly while reassembling the engine. Apply new gaskets and sealants as recommended. Torque all fasteners to the specifications outlined in the service manual to achieve proper sealing and performance.
7. Final Checks and Installation
Once reassembled, perform a thorough inspection to ensure everything is in place. Install the engine back into the car, reconnecting all components systematically while making sure no wires or hoses are missed. Refill fluids and check for leaks.
8. Break-In Procedure
After installation, follow a proper break-in procedure. Start the engine and let it idle for a few minutes, monitoring for any unusual noises or leaks. Gradually increase RPMs, but avoid excessive acceleration during the first few hundred miles to allow the new components to seat properly.
By following this step-by-step process, you will set yourself up for a successful engine rebuild, ensuring your classic car runs smoothly and reliably for years to come.


