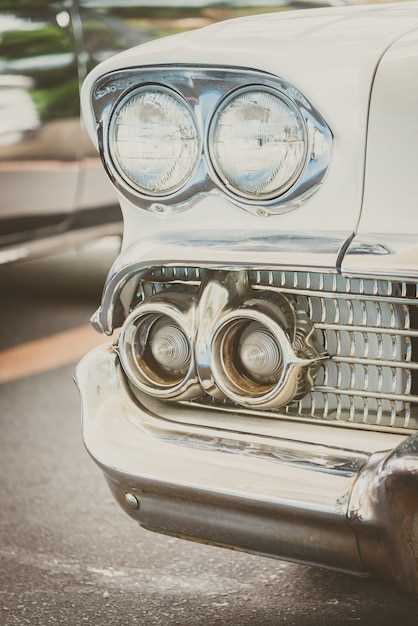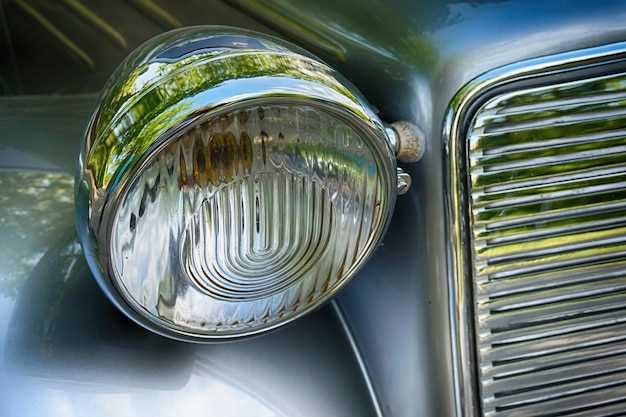
Restoring a classic car is an art that requires attention to detail and a deep appreciation for automotive history. One of the crucial aspects of this restoration process is replacing chrome parts, which not only enhance the vehicle’s aesthetic appeal but also preserve its original charm. Over time, chrome can become tarnished, chipped, or rusted, detracting from the car’s beauty and value. Therefore, understanding how to properly replace these components is essential for every classic car enthusiast.
When embarking on a chrome restoration project, it’s important to first assess the condition of the existing parts. Some may be salvageable through polishing or re-chroming, while others might require complete replacement. This article will guide you through the necessary steps to successfully replace chrome parts, ensuring that your classic car regains its shine and visual integrity.
Replacing chrome parts involves more than just purchasing new components; it requires knowledge of the car’s make and model, as well as the proper tools for installation. Whether you’re dealing with bumpers, trims, or moldings, this guide will provide you with practical tips and techniques to achieve professional results. Join us as we dive into the world of chrome restoration, and learn how to revive your classic car’s timeless elegance.
Choosing the Right Chrome Parts for Your Classic Car Restoration
When it comes to the restoration of classic cars, selecting the appropriate chrome parts is crucial for both aesthetics and functionality. Chrome accents not only enhance the visual appeal of a vehicle but also contribute to its overall value.
First and foremost, it is essential to identify the specific needs of your restoration project. Research the original specifications of your classic car, including the types of chrome parts used in its manufacturing. OEM (Original Equipment Manufacturer) parts are often the best choice for maintaining authenticity and preserving value.
After determining the original requirements, explore various suppliers. High-quality chrome parts are available through specialized retailers, online marketplaces, and classic car shows. Look for vendors that provide detailed descriptions, customer reviews, and warranties, which ensure the quality and durability of the parts.
Another vital aspect to consider is the finish of the chrome. Not all chrome finishes are created equal; some may have a mirror-like shine, while others offer a brushed or matte appearance. Choose a finish that aligns with the style of your vehicle and your personal preferences for a cohesive look.
It’s also important to examine the material and construction of the parts. Stainless steel, for example, can offer superior resistance to corrosion, making it a popular choice for classic car restorations. Evaluate the weight and feel of the parts to ensure they will withstand the wear and tear of driving.
Finally, budget accordingly. While high-quality chrome parts may come at a premium, investing in the right components can pay off in the long run, enhancing both the appearance and performance of your restored classic car. Avoid overly cheap options that may compromise quality, as this can lead to recurring issues and additional costs down the line.
Step-by-Step Guide to Removing Old Chrome Parts Safely

Removing old chrome parts from classic cars requires caution and precision to prevent damage to the surrounding areas. Follow these steps for a successful removal.
1. Gather the Necessary Tools
Before starting, collect essential tools such as a socket wrench set, screwdrivers, pliers, and a soft cloth. It’s also advisable to have a parts organizer to keep track of screws and small components.
2. Prepare the Work Area
Ensure your work area is clean and well-lit. Park the car on a flat surface and engage the parking brake. If applicable, remove any nearby parts that could obstruct your access to the chrome components.
3. Inspect the Chrome Parts
Examine the chrome parts you intend to remove. Identify how they are attached to the vehicle, whether by screws, bolts, or clips. For complex installations, consult the vehicle’s service manual for specific guidance.
4. Remove Fasteners
Carefully remove any fasteners securing the chrome parts. Use the appropriate tool to avoid stripping screws or breaking clips. Keep all removed fasteners in your parts organizer to ensure nothing is lost.
5. Gently Pry Off Chrome Parts
Once the fasteners are removed, gently pry the chrome parts away from the vehicle. Use a soft cloth to protect the paint and avoid scratching the surface. Apply even pressure to prevent bending or breaking the chrome.
6. Clean the Area
After removing the chrome parts, clean the area with a suitable cleaner. Remove any adhesive residue, dirt, or grime to prepare for the installation of new parts.
7. Inspect for Damage
Check for any underlying damage that may need addressing before installing new chrome parts. Repair any rust or surface issues to ensure longevity and a proper fit for the new components.
8. Store the Old Parts Safely
Store the removed chrome parts securely if you plan to keep them for restoration or resale. Wrap them in a soft cloth to prevent scratches and store them in a dry place.
By following these steps, you can safely remove old chrome parts from your classic car, setting the stage for an effective restoration process.
Techniques for Installing New Chrome Parts to Ensure a Perfect Fit

When restoring a classic car, ensuring that new chrome parts fit perfectly is crucial for both aesthetics and function. Proper installation techniques can make the difference between a seamless look and a poorly executed restoration. Here are key methods to follow.
First, always start by cleaning the area where the new parts will be installed. Remove any rust, old adhesive, or debris to create a smooth surface. This not only prepares the area for the new parts but also prevents any contaminants from affecting the final look.
Next, mock-up the new chrome parts before permanent installation. Temporarily position the parts on the vehicle to check for alignment and fit. This step allows you to identify any adjustments needed, ensuring that the parts complement the contours of the car without gaps or overlaps.
During installation, use the appropriate fasteners that match the original specifications. Set screws or clips must be chosen carefully to secure the chrome parts without causing damage. Applying a thin layer of anti-seize compound on threads can prevent rust and make future maintenance easier.
When securing chrome trim or moldings, avoid overtightening, as this can lead to bending or chipping. Instead, aim for a snug fit that holds the parts securely while maintaining their integrity. If necessary, use rubber washers or gaskets to cushion the connection points.
Finally, after installation, inspect all joints and edges for uniformity. A perfect fit involves smooth transitions between chrome parts and the body of the car. Consider applying a specialized chrome polish after installation to enhance luster and provide additional protection against environmental elements.
By following these techniques, you can ensure that your new chrome parts fit perfectly, maintaining the integrity of your classic car restoration.


